The pick and roll is basketball’s ultimate weapon, deadly if left unchecked. But defending it isn’t one-size-fits-all. From Low Drop to Ice Defense, each strategy brings its own unique strengths and challenges. In this article, we’ll break down the most effective ways to stop the pick and roll moving from the least aggressive to the most aggressive approaches.
1. Low Drop Pick & Roll Defense
In a low drop, the screener’s defender is positioned near the nail, sometimes even deeper into the paint.
Role of the Screener's Defender
The primary role of the screener’s defender in a low drop is to always stay between the roller and the basket. This ensures rim protection and limits easy paint opportunities.
Many teams employ the philosophy of “no man behind,” where the screener’s defender keeps both the ball handler and the roller in front of him. As the ball handler navigates the screen, the screener’s defender backpedals, discouraging rim attempts and forcing long mid-range jumpers—the least efficient shot in basketball.
Role of the Ball Handler's Defender
In general, the on-ball defender must fight over the screen to maintain drop coverage principles, which aim to eliminate threes and rim attempts while forcing mid-range shots.
However, depending on the ball handler’s shooting ability or decision-making skills, the defender might choose to go under the screen to neutralize the 2-on-1 advantage or to counter an efficient mid-range scorer.
When to Use Low Drop Defense?
1. To Force Long 2s
Low drop defense focuses on forcing inefficient mid-range shots while protecting the rim and open threes, the two most statistically favorable scoring areas.
2. To Minimize Defensive Responsibilities
Low drop coverage has become increasingly popular in modern basketball due to its ability to simplify defensive responsibilities and minimize rotations. By allowing two defenders to contain the pick-and-roll, it reduces the need for tagging and adapts effectively to the spacing challenges posed by 4-out-1-in and 5-out offenses.
This approach lowers the risk of defensive breakdowns and provides a practical, efficient alternative to the previously dominant hedge defense, especially in a game filled with capable shooters.
Challenges and Limitations of Low Drop Defense
1. Personnel Issues
Sometimes, teams resort to drop coverage because their bigs lack the speed for other schemes. Slow bigs struggle to hedge effectively or recover quickly on checks, making drop defense a necessity rather than a choice. Switching defenses can also lead to mismatches against elite guards, further justifying the use of drop coverage.
2. Against Pick and Pop
Drop defense struggles against offenses that utilize pick-and-pop actions with strong-shooting screeners.
3. Against Skilled Playmakers
Drop coverage is vulnerable to elite mid-range scorers who can exploit the space created by screens with snake dribbles or pull-up jumpers. Additionally, playmakers who excel in 2-on-1 situations can neutralize the scheme by creating open shots for themselves or teammates through precise reads and rotation manipulation. Against such skilled offensive players, drop coverage may leave the defense exposed and prove less effective.
2. High Drop Pick & Roll Defense
As low drop defense grew in popularity, teams countered by setting higher screens, giving ball handlers more space to attack. This allowed skilled shooters to pull up for threes and ball handlers to exploit the open space more effectively, reducing the impact of low drop coverage.
To adapt, defenses began raising the screener's defender, as the original goal of forcing inefficient mid-range shots was undermined by improved offensive efficiency and playmaking through higher screens.
Role of the Screener's Defender
The positioning of the screener’s defender in high drop defense varies based on the coach’s philosophy but is typically about two steps behind the screen, prioritizing containment of the ball handler. This approach shifts the offensive responsibility to the screener, who often has weaker playmaking skills than the ball handler, making it easier for the defense to disrupt the play.
In low drop, the screener’s defender prioritizes keeping both the ball handler and the roller in front to guard against a 2-on-1 scenario. In high drop, the primary focus is to contain the ball handler, preventing open pull-up threes, mid-range shots, or easy playmaking opportunities. This naturally increases the importance of tagging the roller, as the screener’s defender may be higher up the court.
Role of the Ball Handler's Defender
The ball handler's defender in high drop defense has a role similar to their role in low drop. The key distinction is that they must ensure the ball handler uses the screen, as the screener's defender is positioned to contain them on that side.
Defense is a collective effort built on trust, and allowing the ball handler to reject the screen can open easy driving lanes and expose the defense.
When to Use High Drop Defense
1. Against High Screens
As teams began setting higher screens to create more spacing and generate efficient shots, it was only natural for defenses to adapt and adjust their strategies accordingly.
2. Against Creative Ball Handlers
There are several defensive strategies to counter creative ball handlers, with high drop defense being the least aggressive among them. While high drop defense aims to contain ball handlers, its primary focus remains on rim protection through the positioning and efforts of the screener's defender.
3. Against Screeners Who Can't Run the Offense
Unlike low drop, high drop occasionally forces the screener to make decisions when the ball handler is pressured. Since screeners are often less effective decision-makers compared to ball handlers, this shift in responsibility can work to the defense's advantage by disrupting the offense's flow.
Challenges and Limitations of High Drop Defense
1. Against Pick and Pop
Although high drop defense is more effective than low drop at defending the pick-and-pop, as the screener's defender is positioned higher on the floor, it still struggles against screeners with a quick shooting release. Additionally, if the screener is a skilled playmaker, quick ball movement to the popper can create effective offensive opportunities, making it difficult for the defense to recover and contest.
2. Defensive Rotations
Unlike low drop defense, which aims to guard the two-man screen action with just two defenders and without relying on a tag man, high drop defense requires a third defender to tag the rolling screener. This added responsibility forces the rest of the defense to rotate, and if the rotations are not executed properly, it can lead to open looks for the offense.
3. Slow Recovery
The ballhandler's defender must recover quickly to the ball handler, but if the recovery is delayed, the defense may be forced to switch, potentially creating a mismatch that the offense can exploit.
3. Ice Pick & Roll Defense
Ice defense, also known by many names like Blue, Down, or Push, aims to force the ball handler towards the sideline. Most teams use screens to attack the middle of the paint, creating multiple options, but Ice defense disrupts this by steering the screen action to the side.
Role of the Screener's Defender
The role of the screener's defender in Ice defense is quite similar to their role in drop coverage. The key difference is positioning—while drop defense places the screener's defender on the side where the ball handler uses the screen, Ice defense positions them on the side where the ball handler rejects it (if the screen is set towards the middle of the court).
Role of the Ball Handler's Defender
The key to Ice defense lies in the on-ball defender. When the screener sets up toward the middle, the on-ball defender must ensure the ball handler cannot use the screen. To do this, the defender steps forward, positioning themselves to block the path to the screen and forcing the ball handler to reject it. As the screener’s defender contains the drive, the on-ball defender must recover back to the ball handler.
When to Use Ice Defense
1. Against Side Pick-and-Rolls
Ice defense forces the ball handler away from the rest of the players, isolating the action and limiting their options to themselves, the roller, or the popper. For this reason, Ice defense is primarily used against side pick-and-roll situations.
2. To Set Up Sideline Traps
Using the sideline as a "6th defender," many teams capitalize on a successful Ice defense by setting up traps. Since the defensive positioning in Ice already forces the ball handler toward the sideline, it naturally creates an ideal setup for a trap, adding pressure and limiting passing options.
3. Effective Even With Slow Defenders
Ice defense is somewhat easier for the screener's defender compared to high drop coverage. In high drop defense, the screener's defender must contain the ball handler until the on-ball defender recovers, as the ball handler uses the screen. However, in Ice defense, the ball handler is prevented from using the screen altogether, allowing the on-ball defender to recover much faster. As a result, the screener's defender doesn't need to provide prolonged containment and can maintain a "no man behind" position, similar to low drop. This makes Ice defense one of the most stable and secure screen defenses.
Challenges and Limitations of Ice Defense
Miscommunication
The primary goal of Ice defense is to force the ball handler towards the sideline. To achieve this, the screener's defender also positions themselves toward the sideline to contain the ball handler effectively. However, if there is a breakdown in communication and the on-ball defender allows the ball handler to drive middle, it creates an open lane to the basket. Clear communication and alignment among all defenders are critical for Ice defense to function properly.
4. Weak Pick & Roll Defense
Weak defense is almost always paired with Ice defense. While Ice is designed for side screen actions, Weak defense is used for middle screen actions. Its primary goal is to force the ball handler toward their weak, non-dominant hand—left for right-handed players and right for left-handed players. However, since identifying the non-dominant hand isn’t always straightforward, many coaches simplify the terminology by using "Weak" to mean left and "Strong" to mean right.
Role of the Screener's Defender
The screener's defender in Weak defense plays a role similar to that in Ice coverage - anticipate where on-ball defender will direct the ball handler and occupy that space. Depending on team strategy, the defender’s positioning may vary, but they focus on containing the ball handler while backpedaling. At the same time, they adhere to the "no man behind" philosophy, maintaining a position between the ball handler and the rim.
Role of the Ball Handler's Defender
The on-ball defender’s role is also similar to Ice defense but with a key difference. Instead of steering the ball handler toward the sideline, they force them toward their weak hand. The defender's body positioning prevents the ball handler from rejecting the screen while directing them toward their weak hand. This approach allows the defender to either prevent the ball handler from using the screen or let them use it, depending on the direction of the ball handler's movement, rather than focusing solely on the screen's location.
When to Use Weak Defense
Against Players With Less Dominant Off-Hand
Even at the professional level, players are more skilled and versatile with their dominant hand, making it more likely for mistakes to occur when forced to use their weak hand. While many can execute basic passes or finishes near the rim with both hands, more advanced actions—such as delivering precise passes to the weak-side corner or performing tight dribble moves—are often less effective with the non-dominant hand. Weak defense leverages this limitation to disrupt offensive flow and slow the game down, even marginally, which can have a significant impact at higher levels of play.
Challenges and Limitations of Weak Defense
Identifying the Dominant Hand
One potential challenge with Weak defense is identifying the ball handler's dominant hand. While scouting reports and repeated matchups typically make this clear, brief hesitation or miscommunication can be exploited by the offense. To mitigate this, teams often assume most ball handlers are right-handed and naturally position to give up the left side. Statistically, only about 10% of people worldwide are left-handed, making this a viable default strategy. When defenses intentionally give up the right side instead, they sometimes refer to this as "Strong" defense, the opposite of Weak.
5. Hedge Pick & Roll Defense
Hedge defense has two main types: Hard Hedge and Flat (or soft) Hedge. Hard Hedge is more aggressive, but both aim to disrupt the ball handler’s plan by applying pressure and forcing quick decisions.
Some may wonder how hedge defense differs from high drop defense. The key difference between hedge and high drop defense lies in positioning. Hedge pushes the ball handler away at a higher line to force quick passes, while high drop stays lower to contain space and limit shots or playmaking. Hedge emphasizes immediate pressure, while high drop focuses on control and containment.
Role of the Screener's Defender
In Hedge Defense, the screener's defender steps out 1-2 steps above the screen (Hard Hedge) or aligns with it (Flat Hedge) to pressure the ball handler’s action. The goal isn’t to contain the ball handler until the on-ball defender recovers but to force the ball out of their hands and then quickly recover to the screener.
Up until now, "recovery" was used to explain the on-ball defender's movements, but in Hedge Defense, it applies to the screener's defender. This dual task of "showing" to pressure the ball handler and "recovering" back to the screener explains why many coaches describe Hedge Defense as "show and recover."
Role of the Ball Handler's Defender
The role of the on-ball defender in Hedge Defense is straightforward—fight through the screen to recover back to the ball handler. However, the execution is far more complex. While navigating the screen, the defender must also account for the passing lanes created by the two defenders involved in the action.
Ideally, the on-ball defender stays close to the screener’s hip before releasing back to the ball handler, effectively cutting off passing options. In practice, though, achieving this level of precision is extremely challenging in the fast-paced nature of the game.
When to Use Hedge Defense
1. Neutralizing the Ball Handler's Creativity
Hedge defense applies pressure to force the ball handler into making quick decisions. This pressure disrupts the flow of the offense by compelling the ball handler to release the ball earlier than intended, effectively limiting the opportunities for the team’s primary decision-maker to initiate or execute offensive plays.
2. If the Screener's Defender is Mobile
Much of the success in hedge defense depends on the screener's defender. When this defender is mobile and can execute the strategy effectively, it becomes one of the best ways to neutralize the ball handler while simultaneously disrupting offensive plays. A quick recovery back to the original matchup ensures minimal defensive breakdowns and maximizes the defense's effectiveness.
3. Against Weak Rollers and Pick-and-Pop Threats
Hedge defense shifts decision-making pressure from the ball handler to the rolling screener. If the screener is not an effective decision-maker in these situations, the offense will struggle to capitalize on the defensive pressure. Additionally, when the screener opts to pop instead of roll, the defense can easily switch to neutralize the shooting threat.
Challenges and Limitations of Hedge Defense
1. Late Tag
One of the main reasons hedge defense fails is the tag man not being in the right position at the right time. Because the defense is committing two defenders to the ball handler, it creates a 4-on-3 situation on the backline, relying on the tag man to leave their matchup, typically from the corner, to "tag" the roller. If this action is not executed perfectly, it often leads to an easy scoring opportunity for the offense.
2. Catch-and-Shoot 3s
Even with a perfectly executed tag, the rest of the defense must rotate seamlessly to maintain coverage. When done correctly, this coordinated effort can significantly drain time off the shot clock and disrupt the offense's rhythm. However, a single missed assignment or late rotation can lead to a wide-open catch-and-shoot opportunity, exposing the vulnerability of hedge defense.
3. Against Empty Side Pick-and-Roll
Tagging the roller becomes especially challenging in an empty-side pick-and-roll since the help must come from the opposite side of the court. The tag man has a large area to cover, making timely rotations difficult. Even if they arrive on time, the weakside corner player can cut to the dunker spot, creating an easy scoring opportunity. This puts additional strain on the screener’s defender, who now has to recover across a significant distance, further exposing the defense.
4. Slow Bigman
As effective as hedge defense can be with a quick-footed big man, it becomes a major liability with a slower big. If a slow-footed big steps up to hedge without proper backline rim protection, the defense is left vulnerable, creating an open lane for the roll and easy scoring opportunities.

6. Blitz Pick & Roll Defense
Blitz Defense, the most aggressive screen defense covered in this article, is essentially a sudden double team on the ball handler. At higher levels, this scheme isn’t used on consecutive possessions, as it’s easily exploited. However, at lower levels, I’ve seen it work possession after possession, often shifting the momentum of the game because many ball handlers struggle to handle the pressure, and the teammate receiving the pass often fails to make the right decision.
Blitz Defense is frequently paired with high-pressure off-ball defense, sometimes sacrificing a corner defender to apply extra pressure on the nearest passing option.
Role of the Screener's Defender
The key to a successful Blitz Defense is surprise. Like Hedge Defense, the screener’s defender steps up to screen level, but instead of containing, they aggressively trap above the screen once the on-ball defender applies pressure. If executed perfectly, the ball handler is forced toward the sideline while the screener’s defender cuts them off with high hands to disrupt vision and force a turnover. The trap must hold until the ball handler picks up their dribble.
Role of the Ball Handler's Defender
The on-ball defender plays a crucial role in Blitz Defense. As soon as the trap is triggered, they must force the ball handler diagonally toward half court and the screen, creating the ideal angle for the screener’s defender to join the blitz. With active hands, both defenders work to disrupt vision and force the ball handler to pick up their dribble. Once the dribble is dead, the blitz transitions into a full trap, applying maximum pressure to force a turnover.
When to Use Blitz Defense
1. Disrupting the Flow of Elite Ball Handlers
Elite ball handlers thrive on reading and dissecting defenses, so mixing up coverages is crucial. Blitz Defense applies relentless pressure, forcing the ball handler to pick up their dribble, limiting both their space and time to create. When executed well, it can effectively disrupt the offense and take the primary playmaker out of rhythm.
2. Exploiting Weak Ball Handlers
Ironically, blitz defense is also effective against weak ball handlers. While more common at lower levels, it’s not exclusive to them. Blitz defense not only disrupts the offense but also mentally breaks down the ball handler, leaving them demoralized as they repeatedly turn the ball over.
Challenges and Limitations of Blitz Defense
1. Rotational Challenges
Similar to hedge defense, blitz defense puts the backline in a 4-on-3 situation. To execute it effectively, a structured defensive rotation is crucial to neutralize the offense if the blitz doesn’t result in a turnover. Late tags or missed rotations can lead to easy rim opportunities or wide-open three-pointers.
2. Difficulties in Recovery for the Screener's Defender
While the recovery for the screener's defender in blitz defense is similar to that of hedge defense, it’s more challenging because the defender steps out further in a blitz. As a result, they have to cover a larger area. The big man must possess the agility to quickly initiate the blitz and seamlessly transition back to their defensive assignment.
7. Switch Pick & Roll Defense
Switch defense occurs when the screener's defender takes on the ball handler while the on-ball defender covers the screener following the screen. As the name suggests, the two defenders switch assignments, each matching up with the offensive player closest to them. Since this strategy eliminates the need to fight through screens, it is theoretically the simplest defensive approach to execute.
Role of the Screener's Defender
In switch defense, the screener's defender assumes the role of the primary on-ball defender by stepping up to the ball handler. It's crucial for this defender to position themselves high enough to prevent giving up an open shot after the switch. Some coaches advocate for an initial jump to catch the ball handler off guard and force a turnover, but elite ball handlers can exploit this move by driving easily to the basket. Therefore, this tactic is best reserved for situations where the screener's defender is exceptionally mobile.
Role of the Ball Handler's Defender
In switch defense, the ball handler's defender is tasked with switching onto the screener. Offenses often counter continuous switch defenses by prompting the screener to slip or roll quickly to the basket to exploit a size advantage. In response, the ball handler's defender must fight to stay between the rolling screener and the rim, preventing an easy drive and holding their ground as much as possible. Moreover, since the screener is typically larger than the on-ball defender, if the screener establishes a good post-up position, this defender must work to deny the entry pass and minimize any mismatch.
When to Use Switch Defense
1. Two-Player Containment
Switch defense streamlines coverage by allowing two defenders to contain a two-man action without additional help. Since defenders don’t have to fight through screens, they can avoid the complex pressure-and-recovery process. Each defender sticks to one offensive player, keeping the defense compact and simplifying execution.
2. Disrupting Screen-Heavy Offenses
Switch defense neutralizes offenses that heavily rely on screens to initiate plays or create separation. It enables defenders to seamlessly switch assignments, quickly close out on perimeter shooters, and deny quality looks. As a result, this strategy can effectively disrupt set plays and designated actions, forcing opponents to adjust their approach.
3. Forcing Isolation
Switch defense disrupts plays and consumes the shot clock, forcing the offense into taking low-percentage shots. Additionally, frequent switches can create mismatches that isolate offensive players in one-on-one situations. If the isolated offensive player struggles in these scenarios—a common occurrence at lower levels—the defense gains a significant advantage.
Challenges and Limitations of Switch Defense
1. Mismatch Vulnerabilities
While mismatches might be exploited defensively at lower levels, they become a significant liability in higher-level competition. Skilled offensive players can capitalize on these mismatches—especially in the low post—when a smaller defender is forced to guard a larger, more dominant screener. In such scenarios, the resulting advantage often leads to high-percentage scoring opportunities for the offense.
2. Vulnerability to Slip Screens
When defenses switch, a tight gap opens in the middle where the screener can roll. To prevent an easy rim run, the defender must quickly get underneath the roll man. However, offenses counter this by using a slip screen, where the screener rolls early before making contact. Reacting to a slip screen in real time is extremely difficult, especially in the fast pace of the game.
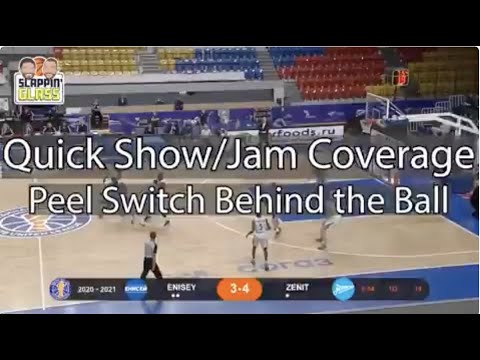
3. Slip and Seal (and How to Counter With Pre-Switch and Peel Switch)
After the screen, the screener rolls to the basket and seals their defender, exploiting the mismatch. When combined with a slip, this deadly combo becomes a go-to strategy for beating switch defense. Once executed, it's extremely difficult for the defense to recover because the offensive player gains both size and a favorable position. To counter this, the defense must anticipate the move and act early with strategies like pre-switch and peel switch.
Pre-switch is a defensive tactic where, instead of the slower screener's defender following the screener into the screen action, a quicker, more agile defender is assigned to guard that action. This strategy prevents a potential mismatch by avoiding a scenario where a slower, bigger defender ends up on the ball handler, and it allows the primary rim protector—usually the screener’s original defender—to remain close to the basket.
A quicker defender (X2) guards the screen action instead of a slower defender (X5)

Peel switch is a defensive tactic employed when an offensive player beats their initial defender. In such cases, another defender leaves their own assignment to contest the play, while the beaten defender switches to cover the now-vacated matchup. In this scenario, the original screener's defender—who stayed close to the basket as part of the pre-switch—then switches onto the rolling screener to neutralize the mismatch. This coordinated three-way switch covers all areas of the court without giving up any favorable matchups.
The X5 defender, acting as the rim protector, stays near the rim before switching back to the screener. Meanwhile, X1 peel switches to cover the corner.

Basketball Strategy and Performance Analyst. Passionate about breaking down the game to its core, combining in-depth basketball insights with data-driven analysis to elevate understanding of the sport.