During my coaching career, I've learned that sometimes the best defensive strategy isn't the most conventional one. The box and 1 defense has been my secret weapon in numerous games where we needed to neutralize a dominant scorer while still maintaining strong team defense.
Today's basketball heavily favors offensive players, making it crucial to have defensive schemes that can disrupt offensive rhythm. The box and 1 is exactly that - a hybrid defense that combines man-to-man principles with zone concepts to create defensive chaos.
In coaching circles, this non-traditional style is called a "junk defense”.
What is the Box and 1 Defense?
The box and 1 is a combination defense where four players form a box-shaped zone while one defender (X1) plays man-to-man against the opponent's best scorer (1).
Think of it as putting handcuffs on their star player while your other four defenders protect against everything else. The goal here is to frustrate the star and force role players to take on new and uncomfortable positions.
More often than not, teams that rely so heavily on their star don’t prepare for this in practice. Sometimes, the best defense is breaking the other team down mentally.
Why Use the Box and 1?
Strategic Advantages:
- Creates unique challenges that most teams don't prepare for
- Psychologically disrupts star players and team dynamics
- Forces role players into uncomfortable positions
- Can dramatically reduce scoring from dominant players
Most teams prepare for traditional man-to-man or zone defenses, but the box and 1 creates unique challenges that can throw off even the most disciplined offenses.
Last season, we faced a team with a phenomenal shooter who had been averaging 28 points per game. We switched to a box and 1, and he finished with just 11 points. Their entire offense fell apart because they'd become so dependent on his scoring.
The psychological impact of this defense shouldn't be underestimated. Star players often become frustrated when they can't get clean looks at the basket, and that frustration can spread to their teammates.
I've seen entire teams abandon their offensive sets because their go-to scorer couldn't get free. This mental disruption often leads to forced shots and turnovers that fuel our transition game.
Real-World Example:
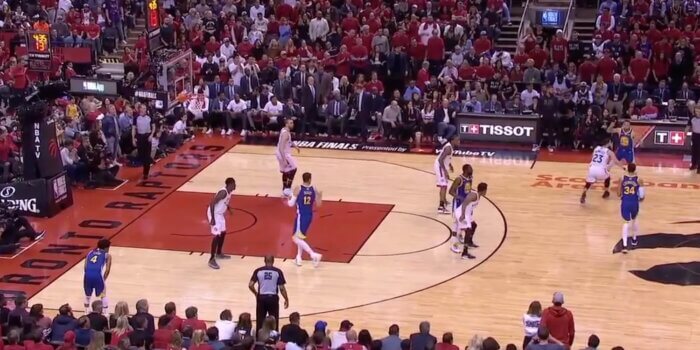
The box and 1's effectiveness isn't limited to high school basketball - we've even seen it work at the highest levels. In the 2019 NBA Finals, Toronto Raptors coach Nick Nurse made headlines by implementing a box and 1 against Stephen Curry and the Golden State Warriors.

With Kevin Durant injured and Klay Thompson sidelined, the Raptors used Fred VanVleet as the chaser on Curry while the rest of the team played zone.
The Warriors, despite their championship pedigree, struggled to adjust to this rarely-seen defense. It was a perfect example of how the box and 1 can disrupt even the most sophisticated offenses when used in the right situation.
Building Your Box and 1 Foundation
Before diving into execution, coaches need to understand that the box and 1 isn't just a gimmick defense - it's a sophisticated system that requires specific personnel and dedicated practice time.
I’ve worked with coaches that made the mistake of throwing it in without proper preparation. The results weren't pretty. I recommend spending at least two weeks laying the groundwork before even thinking about using it in a game.
Let's break down the basic setup that every coach needs to understand:
Basic Box Setup:
The two high box defenders position themselves at the free throw line extended. Your weak-side high defender must always be ready to deny any pass into the high post - this is crucial. Low box defenders should each have a foot in the lane on their respective blocks, ready to front any post player on the strong side.
Ball Movement Positioning:
Ball on the Wing:
- Strong-side high box player closes out to defend
- Weak-side high box player slides to middle to protect high post
- Strong-side low box player fronts post
- Weak-side low box player moves to split line
- Chaser maintains complete denial
Ball in the Corner:
- Strong-side low box defender closes out (no baseline drive!)
- Weak-side low box defender slides to help position
- Weak-side guard drops to gap
- Strong-side guard can either sag or deny reversal
Selecting Your Personnel
Picking the Chaser
The most crucial decision you'll make is choosing your chaser. During my third year coaching, I made the mistake of putting my best overall defender as the chaser. While he was talented, he didn't have the endurance needed for the role.
Your chaser needs superior conditioning, mental toughness, quick feet, and relentless energy. But beyond the physical attributes, they need to be intelligent enough to anticipate screens and mature enough to handle the responsibility of shutting down the opponent's best player.
Picking the Box Defenders
For your box defenders, basketball IQ trumps athleticism. These players need to understand spacing, anticipate cuts, and communicate constantly. I've had great success using slightly slower but smart players in the box positions because they excel at reading the game and staying connected as a unit.
Teaching the Box and 1
Starting with Younger Teams
When introducing the box and 1 to middle school or junior varsity teams, I begin with static positioning drills. We'll literally put tape on the floor to mark the box positions and run simple ball movement drills. This helps players understand their areas of responsibility before adding movement. Once they grasp the basic concepts, we progress to dynamic movements while maintaining box integrity.
Varsity Implementation
At the varsity level, we focus immediately on the fluidity of the box. I tell my players to think of themselves as connected by giant rubber bands - when one moves, everyone adjusts.
We spend considerable time working on rotation patterns and communication. The box isn't static; it's a living, breathing unit that shifts based on ball location and offensive movement.
The Chaser
Teaching proper chasing technique requires specialized drills and continuous refinement. Our Shadow Drill has become a team staple - it focuses on the chaser's ability to stay with their man through various cuts and screens.
We start without screens, then progressively add more complex offensive actions. The key teaching points include:
- Proper denial position
- Screen anticipation and avoidance
- Recovery techniques
- Conditioning while maintaining defensive intensity
Basic Shadow Drill Setup:
Start with three players:
- Offensive player starting at top of key
- Chaser (defender) in denial position
- Passer on wing with basketball
Coaching Points:
I tell my chasers - imagine there's a string connecting your hip to their hip. Stay connected, but don't reach. When I see defenders reaching, I remind them that their feet do the work, not their hands.
Teaching Progression:
We start every rep from one side of half court. As the defensive player gets better, we expand the space to the entire half court. By the end of the week, we're running this drill full court to build endurance.
- Offensive player tries to get open using V-cuts and L-cuts
- Chaser maintains denial position, always between offensive player and ball
- Passer cannot dribble, can only pivot
- 30-second reps, then rotate positions
- Add fourth player as screener
- Screener sets screens at different angles
- Teach chaser to "lock and trail" or "shoot the gap" based on screen angle
- Add fifth player as second screener
- Run basic stagger screen action
- Teach chaser to stay attached through multiple screens
- Focus on taking proper angles and not getting caught on screens
The Box
The four players in the box must move as a coordinated unit. Our Box and 1 Shell Drill teaches defenders how to shift while maintaining proper spacing. We begin with predetermined ball movement, then progress to live play. Success in this drill requires constant communication - players must call out ball location, cutter movement, and defensive adjustments.
In this drill, we are removing the chaser and focusing on the box zone principals.
Teaching Point:
Imagine the box is connected by rubber bands. When I point to the wing, the entire box shifts that direction while maintaining its shape. Top defenders adjust their depth, bottom defenders pinch or widen - but they move together.
Common Mistakes to Watch:
- Box getting too wide or narrow
- Defenders moving individually instead of as unit
- Weak side defenders not shifting far enough
Set up 4 defensive players in box formation (two high, two low). Coach stands at top of key with one basketball.
- Coach points to different perimeter spots (wing, corner, opposite wing)
- As coach points, entire box must shift as a unit to match ball position
- No passing yet - just teaching box movement and spacing
Teaching Point:
I'll typically start by pointing slowly to each spot, then gradually increase the pace as players grasp the concept of moving together.
Add 4 offensive players around perimeter.
- Offense passes ball around perimeter only
- No dribbling, cutting, or screening
- Defense rotates with each pass
- Must call out "Ball!" or “Help!”
Teaching Point:
Start slow and then build up from there. Keep the passing from one spot to the next to start, and then increase the speed and add skip passes once they understand the movements and spacing.
Common Correction:
If you see your box players getting too spread out, stop the drill and have them all take one step closer to each other. Tight spacing is crucial - I'd rather have them too close than too far apart.
Offense can now cut and screen.
- Defense must communicate every cutter
- Add scoring element:
- Defense gets point for deflection/stop
- Offense gets point for paint touch
- First team to 5 points wins (loser has a consequence)
Teaching Point:
When the offense scores, have them explain where the breakdown occurred. This helps players understand their responsibilities and builds defensive IQ.
Often they'll identify the mistake before I need to point it out.
Reading and Countering Offensive Adjustments
After running this defense for years, you start to see patterns in how teams attack it. Let's break down the most dangerous actions and how to stop them:
Pick and Roll Actions
If they try to free their scorer with ball screens, our box automatically shifts. The closest box defender shows hard on any ball screen while the opposite box defender drops to protect middle penetration. This is exactly what the Raptors did against Curry in the Finals - they forced the ball out of his hands and lived with role players making plays. The box defenders communicated every screen, allowing VanVleet to stay connected to Curry without getting caught on screens.
Learn more ways how to defend pick & rolls.
Screen Overload and Motion
Teams will often try to wear down our chaser with constant screens and movement. You’ll face teams that depend so heavily on one player, they’ll run triple-screen actions for their star. The solution to this is simple but effective: box defenders call out screens early and maintain positioning to create recovery lanes for our chaser. We also teach our box defenders to hedge screens and bump the star to slow them down just long enough for our chaser to recover.
For the other offensive players, we teach our box defenders to match cutters only to a certain point before releasing them to the next zone. This prevents offensive players from pulling our box out of position while ensuring no gaps develop in our coverage.
High Post Attacks
The high post flash is one of the most common attacks against the box and 1, and we handle it with our "Pinch and Front” coverage.
We use “Pinch” coverage when the ball is at the top of the key and the high post is in the middle of the free throw line. Both top defenders pinch together to deny high post entry while maintaining position that allows them to sprint and close out to the wing on a pass.
When the ball is not on the top of the key, we teach our weak-side high box defender to deny the high post while the strong-side defender stays connected to the ball.
We always want to front the high post to allow us to get back out to the three point line quicker.
If they do get the ball into the high post, both high box defenders immediately trap, while our low box defenders stay home against cuts.
This creates difficult decisions for the offensive player - try to make a tough pass through the trap, dribble through swarming hands or take a contested shot under pressure. As a coach, you can live with any of those.
Overload and Side Attack
When teams overload one side to collapse our box, we shift as a unit but never extend beyond the three-point line. On any corner catch, the strong-side low box defender closes out under control, taking away the baseline drive.
The weak-side low box defender immediately slides across to protect the rim, while the weak-side high box defender drops into the gap to deny any middle penetration or pass into the high post. This creates a defensive triangle and protects against the most dangerous offensive actions.
Our rule for box defenders remains consistent - never switch screens, instead communicate and "push" through them while maintaining original positions. The high box defenders must call out every cutter - we use "Through!" for middle cuts and "Baseline!" for baseline cuts. When we maintain these rotations and communication, the overload attack often leads to contested shots or turnovers.
Game Situation Management
When to Use Box and 1
Best Situations
Knowing when to implement the box and 1 is just as important as knowing how to run it. I generally look for specific triggers:
- When the opponent's star player has scored several consecutive baskets
- After timeouts when we need to change momentum
- When traditional defenses aren't containing their primary scorer
- In end-of-quarter situations to force the ball out of their best player's hands
Historical Example
The Triangle-and-2 (another “junk defense”) that Coach K used at Duke against North Carolina in the late '90s followed similar principles. They realized if you can take away a team's primary offensive options in crucial moments, you force role players to make decisions they're not comfortable making.
When to Avoid Box and 1
Multiple Scoring Threats
- Teams with 2+ players averaging over 15 points
- Multiple effective three-point shooters
However, there are also situations where the box and 1 isn't the answer. I’ve watched teams focus so much on the 25-point scorer that their second-best player torched them for 30.
Teams with multiple three-point threats can also shred a box and 1. Since you only have two defenders up top in your box, you're essentially leaving one part of the three-point line exposed at all times.
Strong Post Players
- High basketball IQ
- Advanced passing ability
- High-post scoring touch
The defense also loses effectiveness against teams with strong interior presence. A skilled post player can tear apart your box by playing the high-low game. When they flash to the high post, they force your box defenders to make tough decisions - help up and leave the baseline exposed, or stay home and give up the 15-footer.
Either choice creates a defensive breakdown. If they catch it high, they can hit cutters, find shooters, or feed another big on the block.
Your box structure starts to collapse as defenders get caught between multiple responsibilities, creating gaps that good post players will exploit all night long.
Pre-Implementation Strategy
- Scout opponent thoroughly
- Analyze scoring distribution
- Review three-point shooting percentages
- Study offensive tendencies
- Make informed decision based on opponent's strengths
Remember: Sometimes the best coaching decision is knowing when not to use a certain strategy. If the team you're facing has any of these threats, you’re probably better off playing straight man or zone.
Practice Integration
To make the box and 1 truly effective, it needs to be more than just an occasional gimmick. We dedicate time in every practice to defensive fundamentals that translate to both our man-to-man and box and 1 schemes. This includes:
- Communication drills that simulate game situations
- Conditioning work specifically for our chasers
- Live action scenarios against various offensive looks
- Film study of successful box and 1 implementations
The Butler Bulldogs under Brad Stevens were famous for their defensive preparation, installing specific defensive looks weeks before they might need them.
We took this approach with our box and 1, practicing it for 15 minutes every other practice even when we didn't plan to use it. This paid off in an off season tournament when we faced an unexpected matchup against a team with a dominant scorer - our players were ready because the defense was already in their muscle memory.
Conclusion
The box and 1 defense isn't just another tool in your coaching toolbox - it's a game-changing strategy that can completely alter the complexion of a game. Success comes from proper preparation, clear communication, and understanding both its strengths and limitations. When executed properly, the box and 1 can be the defensive answer you've been looking for against teams with dominant individual scorers.
Remember, like any specialized defense, the box and 1 requires commitment and practice to master. But when your team executes it properly, watching an opponent's star player struggle while their offense crumbles makes all the preparation worthwhile.
At the end of the day, the box and 1 boils down to one phrase:
“Make someone else beat us.”

“X’s and O’s by day, sprinkles and glazed by night. When I’m not breaking down the game, you’ll catch me sharing donuts with my family – though we still debate whether dunking them is a technical foul.


