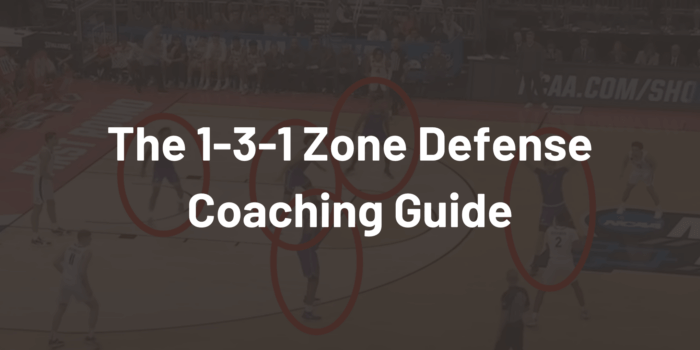
The 1-3-1 zone defense isn’t just a strategy—it’s a weapon. It can throw teams completely off their game, speed up the tempo, and force turnovers that fuel your offense. Whether you’re trying to neutralize a dominant scorer, break an opponent’s rhythm, or simply create chaos on the court, the 1-3-1 has the tools to deliver.
Here’s the best part: you don’t need a team full of giants or elite athletes to make it work. Sure, size and length help, but the real power of this defense lies in how well your players understand their roles, anticipate offensive attacks, and execute rotations. With the right preparation, any team can harness the disruptive potential of the 1-3-1.
In this guide, we’re not just going to talk about the theory of the 1-3-1—we’re going to give you actionable steps to implement it with your team. You’ll learn how to position your players for maximum impact, when to spring traps, and how to adjust to different offensive strategies. By the end, you’ll have everything you need to take this defense from concept to game-changer. Ready to shake things up? Let’s get started.
Here is a quick look at the basic setup of a 1-3-1 Zone:
Advantages of a 1-3-1 Zone
1. Forces Teams Out of Their Comfort Zone
The 1-3-1 defense is unique and disrupts offensive rhythm, requiring opponents to adjust their strategy. Coaches must dedicate practice time to effectively prepare for attacking it.
2. Can Be Used in the Half Court of Full Court
The 1-3-1 can be played at different levels of the court without needing to change the rotations all that much.
3. Speeds Up the Game
By pressuring the ball with traps and using length, the 1-3-1 forces offenses to play faster. Slow decision-making leads to turnovers and easy scoring opportunities for the defense.
4. Transitions Seamlessly into Fast Breaks
With proper positioning, the 1-3-1 allows teams to quickly flow into a transition attack after stops, rebounds, or turnovers.
5. Changes the Game’s Pace
The 1-3-1 defense is a powerful tool for changing the tempo of a game. It can be deployed strategically after timeouts, at the start of a half, or during an opponent’s scoring run to disrupt their rhythm. By incorporating variations and adjustments, this defense keeps the offense guessing and forces them to adapt on the fly.
6. Causes Turnovers
By forcing offenses to throw high or wide passes, the 1-3-1 creates opportunities for deflections, steals, and disrupted passing lanes, leading to more turnovers.
Weaknesses of a 1-3-1 Zone
1. Vulnerable in the Corners and High Post
The high post and corners are natural weak spots in the 1-3-1 zone. Skilled teams can exploit these areas with diagonal passes, skip passes, or placing shooters for open looks.
2. Requires Size for Maximum Effectiveness
While any team can run the 1-3-1, having size enhances its impact. Length helps force deflections, cover more ground, and slow down the ball effectively.
3. Prone to Giving Up Open Shots
The 1-3-1’s aggressive nature, especially with traps, can lead to turnovers but also allows opponents easy buckets or open looks at times. Teams must accept this trade-off.
4. Demands Full Effort from All Players
The 1-3-1 is an active defense that requires high effort and commitment from all players. Any lapse in effort can result in easy shots or breakdowns in coverage.
5. Rebounding Can Be Challenging
Rebounding responsibilities in the 1-3-1 are less defined than in other defenses. Without consistent effort to box out and gang rebound, teams risk giving up numerous second-chance opportunities.
Who should use it?
Anyone can use the 1-3-1 zone, but teams that will benefit from it the most are teams that:
- have some length on their roster that can cover more ground and make direct passes tougher
- teams that have a hard-playing and trapping mentality
- teams that have versatility in their positioning
General Rules of the 1-3-1 Zone Defense
1. Move on the Air of the Pass
Defenders must begin moving while the ball is in the air, not after it has been caught by an offensive player. This proactive movement ensures all five players are rotating to their correct spots simultaneously, making it difficult for the offense to swing the ball around for open shots. Keeping rotations minimal and straightforward will enhance the defense’s effectiveness.
2. Only Sprinting is Allowed
Effort is crucial in the 1-3-1 defense. Players must sprint to their assigned spots; jogging or walking will leave gaps that the offense can exploit. Opponents will quickly identify weak links in the defense, particularly players who aren’t giving maximum effort, and target those areas.
3. No Direct Passes
This is probably the most important rule of the zone. The core principle of the 1-3-1 zone is to eliminate direct line passes. Defenders must close out passing lanes, forcing the offense to lob or pass around them. This disruption slows down the offense and gives the defense more time to rotate and adjust to the ball’s movement.
4. Read Eyes and Shoulders
Elite players may be able to ball fake and throw no-look passes to attack the zone, but hardly anybody can fake with their shoulders. Teach your players off the ball to read the offensive player shoulders to get a jump on where they are wanting to throw their next pass.
5. No Split Traps
When trapping the ball, defenders must ensure the ball handler remains contained. Allowing them to escape the trap creates a dangerous 5-on-3 situation that heavily favors the offense. Defenders should use the sideline or baseline as an additional defender and position themselves at angles that prevent the ball from slipping out of the trap.
6. High Hands on Everything
Defenders should always keep their hands high during closeouts and rotations. High hands make it harder for offensive players to execute quick reversals, force them to hesitate before shooting or passing, and increase the chances of deflecting the ball. Even a brief hesitation can give the defense valuable time to recover.
7. Take Away the Obvious Next Pass
Defenders should aim to disrupt the offense by denying the next most logical pass option. This forces the offense to make less comfortable decisions, increasing the likelihood of mistakes. Mastering this skill makes the 1-3-1 zone a highly disruptive defensive strategy.
1-3-1 Zone Defense - Positions and Roles
Our default 1-3-1 formation
Chaser / Top Defender
The top defender should be one of your most athletic and aggressive players. They need to be very active in the defense, get in passing lanes, and force difficult passes up and around them. They must be a pest and make life miserable for the players attacking the top of the zone.
Center
This will likely be your post player or a player you’d like to hide in the defense. Their main responsibility is to stay in between the ball and the rim. They also are taking away passes at the rim and high-post entry passes. They need to have a little capacity for physicality because they’ll be in denial and fronting situations.
Warrior / Back Defender
This is likely your most aggressive and hardest playing player. They’ll be flying around from corner to corner and it’s a lot of ground to cover. The success of the defense probably hinges the most on how hard this player is willing to play and cover the ground successfully…so choose wisely.
Wing Defenders
There are two wing defenders and they play off of each other in this defense. For instance, if the ball is on the right wing - the left wing needs to be opposite the ball and covering the low post/diagonal skip pass. Once the ball is swung and reversed, these players basically exchange spots. Think of them as being on a string together - they are pushing and pulling each other throughout the play. These players must rebound hard, especially on the weak side.
How to Run the 1-3-1 Zone Defense
Trapping Half Court Corners
As the dribbler crosses the half-court line, the ball-side wing will step up and set a trap. We try to force the offense to pick up the dribble and throw a weak lob pass that we can pick off.
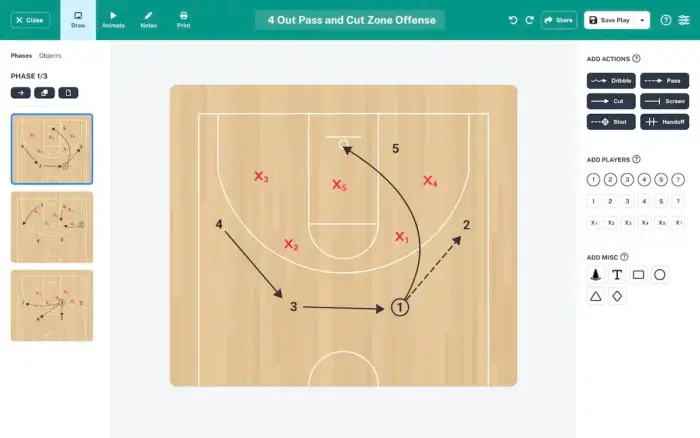
Most teams will attack a 1-3-1 with a 4-out alignment like pictured here.
- 1 (Chaser) and 3 (Wing) trap the ball in the corner
- 2 (Wing) drops to be diagonal of the ball and prevent skip passes to the rim (a vulnerable area)
- 4 (Warrior) makes the read between helping protect the rim and taking away the corner pass to 4
- 5 (Center) covers the high post
- The trapping defenders need to make sure that the offensive player doesn't split the trap.
- Ideally the defenders get the offensive players to pick up the ball.
- We want for force a weak lob pass out of the trap that we can pick off
1 skip passes to 2.
Now, the defense has to rotate accordingly on the air of the pass and in a sprint.
- 1 (Chaser) and 2 (Wing) trap
- 2 (Wing) prevents the easy, quick reversal to 3 first and THEN comes to trap
- 4 (Warrior) covers the block and corner
- 3 (Wing) drops to cover the rim and diagonal pass
- 5 (Center) covers the high post
Same as Phase 2
- The trapping defenders need to make sure that the offensive player doesn't split the trap.
- Ideally the defenders get the offensive players to pick up the ball.
- We want for force a weak lob pass out of the trap that we can pick off
Trapping the Baseline Corners
When the offense passes the ball to the corner we want to trap the player with the ball and force a soft lob pass over the zone that we can pick off.
Standard setup when the ball is on the wing
- 4 (Warrior) closes out to the ball and makes sure to not get beaten baseline
- 3 (Right Wing) closes out with high hands to set a hard trap
- 5 (Center) moves from the high post to cover the block
- 1 (Chaser) moves from the top corner to the high post
- 2 (Left Wing) protects the backside of the rim and floor in general.
- 3 (Right Wing) and 4 (Warrior) put pressure on the ball without fouling. They keep the hands high and pressure with the lower body.
- We try to force a weak lob pass that we can pick off.
- 2 (Left Wing) will sprint out to defend a baseline drive on 3
- 1 (Chaser) and 5 (Center) move to the same position on the strong side
- 4 (Warrior) sprints along the baseline and bumps 2 (Left Wing) back to their normal position
- 3 (Right Wing) drops down to the low block to defend the weak side
The skip pass to the wing is a very dangerous pass to a 1-3-1 zone defense. As it can lead to a quick pass to the corner for an open 3.
- 1 (Chaser) closes out to the ball
- 2 (Left Wing) takes away the quick pass to the 3 in the corner and then comes to double the 2
- 4 (Warrior) sprints baseline to defend the pass to the 3
We are back in our standard positioning with the ball on the wing
Since we are playing the passing lanes in the 1-3-1 zone, sometimes there are gaps that the offense can attack with a dribble
- 5 (Center) steps out with high hands to effectively triple team the attacking player and making it hard on them to find a pass
- 4 (Warrior) and 3 (Right Wing) drop towards the basket to prevent easy passes for a layup
Defending the High Post
The high post is a vulnerable position in the 1-3-1 zone defense and we try to force the ball out of there as quickly as we can.
We try to prevent this pass to the high post as it is a very dangerous position. The offensive player can pass to any player here.
- 1 (Chaser) and 5 (Center) double the high post player and try to force the ball back out to the 1
- 2 (Wing) and 4 ( Warrior) pinch in to avoid a pass to the basket
The skip pass to the weak side wing is a dangerous pass that we try to prevent.
- 1 (Chaser) defends the ball
- 2 (Wing) banana cuts to first prevent the easy pass into the corner, and then double the 2 as soon as the 4 (Warrior) recovers.
Advanced Concepts
What makes the 1-3-1 Zone defense so effective (and usable for just about any level of basketball) is its versatility. You can trap all game, extend the zone to be ¾ court, only trap certain corners, or even tighten it up to pack it in and defend the paint.
Tight 1-3-1 Zone Defense
In the tight 1-3-1 Zone Defense, all the same rules apply except the defense is not trapping AND the players are more tightly packed in during the entire defensive possession.
The main goal is to prevent the ball from entering the zone, and if it does, to quickly collapse on it and force it back outside.
Instead of setting a trap, we stay tight in the zone making passes difficult.
- 1 (Chaser) defends the ball and tries to keep it on the same side of the floor - making reversal passes difficult
- 3 is denying the pass to the corner
- 5 (Center) covers the high post
- 2 (Wing) helps defending the rim and is ready to pick off passes to the weak side corner
- 1 (Chaser) runs to the ball and tries to deny the ball reversal back
- 2 (Wing) rotates from helping inside to getting back to their spot on the wing (they want to make the swing pass to 3 difficult)
- 4 (Warrior) runs the baseline and rotates for extra help
- 3 (Wing) drops diagonally to protect the rim and a pass over the top
- 5 (Center) covers the high post
- 2 swings the ball to the corner
- 5 cuts to low block
- 4 fills the high post
Defending the Ball in the Corner:
- 4 (Warrior) takes the ball and prevents it from being driven baseline
- 2 (Wing) drops for extra help
- 5 (Center) rotates from the high post to the low post
- 1 (Chaser) rotates from the top to defend the high post
- 3 (Wing) reads the best spot for them to be based on where the offense is - this could be rim protection, defending the skip, or providing extra help in the high post
The main goal is to deny the ball to be thrown or dribbled into the zone. The pass back to the top of the key remains open.
1-3-1 Zone Full Court Press
If we want to put extra pressure on the offense we can play a 1-3-1 Zone Defense where we start picking up the ball at the opposing free throw line.
We pick up the ball at the free throw line and shade the offense towards the sideline. Try to force the player to their weak hand.
The offense can never dribble the ball up the middle of the court
We try to trap the ball towards the sideline and look to pick off long passes
We try to prevent this skip pass, but if it happens anyways:
- 1 (Chaser) closes out to the ball and tries to force it further towards the sideline
- 3 (Wing) prepares to double and cuts of a potential dribble along the sideline
- 5 (Center) denies a pass to the middle of the floor
There are different options where to set up the trap. I prefer right after the timeline as it takes away the option to pass into the back court
- 3 (Wing) stops the dribble
- 1 (Chaser) comes for the hard double
- 4 (Warrior) prevents the pass to the corder
- 5 ( Center= denies the pass to the high post area
- 2 (Wing) defends the basket and looks to pick off long skip passes
From here we play our regula half court 1-3-1 zone defense
Customizing the Zone to Trap Selectively
Adjusting the 1-3-1 zone to trap selectively can add an element of unpredictability to your defense, keeping the offense off balance. Instead of consistently trapping in the corners or along the sidelines, vary the traps based on specific triggers, such as when the ball is passed to a weaker ball handler or the star player.This strategic adjustment allows your defense to conserve energy, avoid overexposing weak spots, and surprise the offense when they least expect it. By being selective, your team can maintain defensive discipline while capitalizing on high-pressure moments to force turnovers.
Conclusion
If you’re looking for a zone defense that can keep teams off balance, control the pace of the game, force turnovers, and fit whatever other mold you may need for your defense - the 1-3-1 zone might be the best choice for you.
We hope you enjoyed our guide and that you can effectively install the 1-3-1 defense with your team!

Founder of thehoopsgeek.com. A passionate basketball enthusiast and coding geek, Andy combines a love for sports with technology.

